Even if the default Django User Model caters to all of your needs, it is highly recommended to use a Custom User Model. Django’s official documentation recommends so. Now there are two ways to create a Custom User Model:-
- By extending AbstractBaseUser
- By extending AbstractUser
The first method involves more complicated steps and should be used only when you are sure of what you are doing (Don’t worry, we are coming up with a complete tutorial on that too). In this tutorial we will be extending the AbstractUser which is a subclass of AbstractBaseUser.
Why to create a Custom User Model?
Before, going into how to do it, it is very important to explain why should we use the custom model. Let us take an example, you are running a project and you have used the built-in User model. Now, after sometime your project has expanded a lot and you now want to add extra fields say Mobile Number to your user model. At this point, changing your built-in model would be a big task. However, if you would have chosen a custom user model at the very beginning of your project. You could have easily added the new field.
How to extend Django User Model using AbstractUser?
AbstractUser class inherits the User class and is used to add additional fields required for your User in the database itself. So, it changes the schema of the database. It is basically used to add fields like bio, location, date of birth etc. to the existing User model. This must be done at the very beginning of the project.
Create a new project
Create an empty project with name ‘Customusertutorial’ as detailed in this tutorial.
Now, create a new app called ‘accounts’:
$ python manage.py startapp accounts
In models.py file create a new class of CustomUser as under:-
# accounts/models.py

from django.db import models
from django.contrib.auth.models import AbstractUser

# Create your models here.

class MyUser(AbstractUser):
    mobile_number = models.CharField(max_length=10, unique=True)
    birth_date = models.DateField(null=True, blank=True)
Now add this app in installed app of your settings.py
# customusertutorail/settings.py
INSTALLED_APPS = [


    'django.contrib.admin',
    'django.contrib.auth',
    'django.contrib.contenttypes',
    'django.contrib.sessions',
    'django.contrib.messages',
    'django.contrib.staticfiles',

    # MY APPS
    'accounts',     #add this

]

AUTH_USER_MODEL = 'accounts.MyUser'  #add this
Create forms.py in accounts folder and add the following classes:
# accounts/forms.py

from django import forms
from django.contrib.auth.forms import UserCreationForm, UserChangeForm
from .models import MyUser

class MyUserCreationForm(UserCreationForm):

    class Meta(UserCreationForm):
        model = MyUser
        fields = ('username', 'mobile_number', 'birth_date')

class MyUserChangeForm(UserChangeForm):

    class Meta(UserChangeForm):
        model = MyUser
        fields = ('username', 'mobile_number', 'birth_date')
Edit, the admin.py file to display the custom fields and also to make them editable through admin.
# users/admin.py
from django.contrib import admin
from django.contrib.auth import get_user_model
from django.contrib.auth.admin import UserAdmin

from .forms import MyUserCreationForm, MyUserChangeForm
from .models import MyUser

class MyUserAdmin(UserAdmin):
    add_form = MyUserCreationForm
    form = MyUserChangeForm
    model = MyUser
    list_display = ['username', 'mobile_number', 'birth_date']
    fieldsets = UserAdmin.fieldsets + (
            (None, {'fields': ('mobile_number', 'birth_date')}),
    ) #this will allow to change these fields in admin module


admin.site.register(MyUser, MyUserAdmin)
After saving all the files, run makemigrations and migrate command.
$ python manage.py makemigrations
$ python manage.py migrate
Create a Superuser
Run the following command and fill up the credentials to create the superuser:
$ python manage.py createsuperuser

Username: yourname
Email address: your@email.com
Password:
Password (again):
This password is too common.
Bypass password validation and create user anyway? [y/N]: y
Superuser created successfully.
Creating Templates
Create a directory ‘templates’ inside your project directory i.e. the directory which contains manage.py
Now, inside the ‘templates’ directory create three files ‘base.html’ , ‘home.html’ and ‘signup.html’
<!-- templates/base.html -->
<!DOCTYPE html>
<html>
<head>
  <meta charset="utf-8">
    <title>
        {% block title %}
        Welcome to SaralGyaan
        {% endblock %}
    </title>
</head>
<body>
  <main>
    {% block content %}
    {% endblock %}
  </main>
</body>
</html>
<!-- templates/home.html -->
{% extends 'base.html' %}
{% block title %}
Home
{% endblock %}

{% block content %}
{% if user.is_authenticated %}
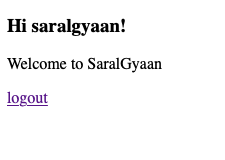
  <h3>Hi {{ user.username }}! </h3>
  <p>Welcome to SaralGyaan</p>
  <p><a href="{% url 'logout' %}">logout</a></p>
{% else %}
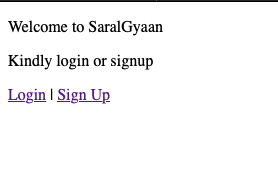
  <p>Welcome to SaralGyaan</p>
  <p>Kindly login or signup</p>
  <a href="{% url 'login' %}">Login</a> |
  <a href="{% url 'accounts:signup' %}">Sign Up</a>
{% endif %}
{% endblock %}
<!-- templates/signup.html -->
{% extends 'base.html' %}

{% block title %}
Signup - SaralGyaan
{% endblock %}

{% block content %}
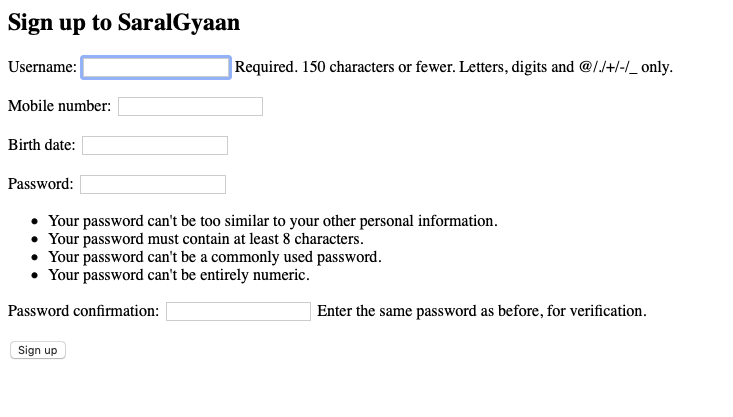
<h2>Sign up to SaralGyaan</h2>
<form method="post">
  {% csrf_token %}
  {{ form.as_p }}
  <button type="submit">Sign up</button>
</form>
{% endblock %}
Lastly, create a directory ‘registration’ inside the ‘templates’ and create a file ‘login.html’
<!-- templates/registration/login.html -->
{% extends 'base.html' %}

{% block title %}
Login - SaralGyaan
{% endblock %}

{% block content %}
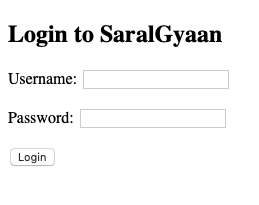
<h2>Login to SaralGyaan</h2>
<form method="post">
  {% csrf_token %}
  {{ form.as_p }}
  <button type="submit">Login</button>
</form>
{% endblock %}
Update settings.py to use the templates
Update the settings.py file to use the templates directory which we have created above:
# customusertutorial/settings.py

TEMPLATES = [
    {
        ...
        'DIRS': [os.path.join(BASE_DIR, 'templates')], # add this
        ...
    },
]
On login and log out we want to re-direct our users to the home page. To do the same, update the settings.py:
# customusertutorial/settings.py

LOGIN_REDIRECT_URL = 'home'
LOGOUT_REDIRECT_URL = 'home'
Creating views
Head to views.py file in accounts and create the SignUpView.
# accounts/views.py

from django.urls import reverse_lazy
from django.views.generic.edit import CreateView

from .forms import MyUserCreationForm


class SignUpView(CreateView):
    form_class = MyUserCreationForm
    success_url = reverse_lazy('login')
    template_name = 'signup.html'
Defining urls
Finally, we need to define the urls for Signup, login and home view. Create a new file ‘urls.py’ in accounts and add the following code:-
# accounts/urls.py

from django.urls import path
from .views import SignUpView

urlpatterns = [
    path('signup/', SignUpView.as_view(), name='signup'),
]
Go to project’s urls.py and add the following code:-
# customusertutorial/urls.py

from django.contrib import admin
from django.urls import path, include
from django.views.generic.base import TemplateView

urlpatterns = [
    path('', TemplateView.as_view(template_name='home.html'), name='home'),
    path('admin/', admin.site.urls),
    path('accounts/', include(('accounts.urls', 'accounts'))),
    path('accounts/', include('django.contrib.auth.urls')),
]
Run the Server
Now, run the server using the following command and check the home page, login page, signup page etc.
$ python manage.py runserver
Homepage
Login
Signup
Homepage when user is logged-in
The complete code can be downloaded from here
Hope you have enjoyed this tutorials. Please share, like and comment.

