DigitalOcean Referral Badge
Udit Vashisht
Author: Udit Vashisht


How to create a re-usable Star Rating View in SwiftUI?

  • 3 minutes read
  • 1091 Views
How to create a re-usable Star Rating View in SwiftUI?

    Table of Contents

Create a Star Rating view in SwiftUI?

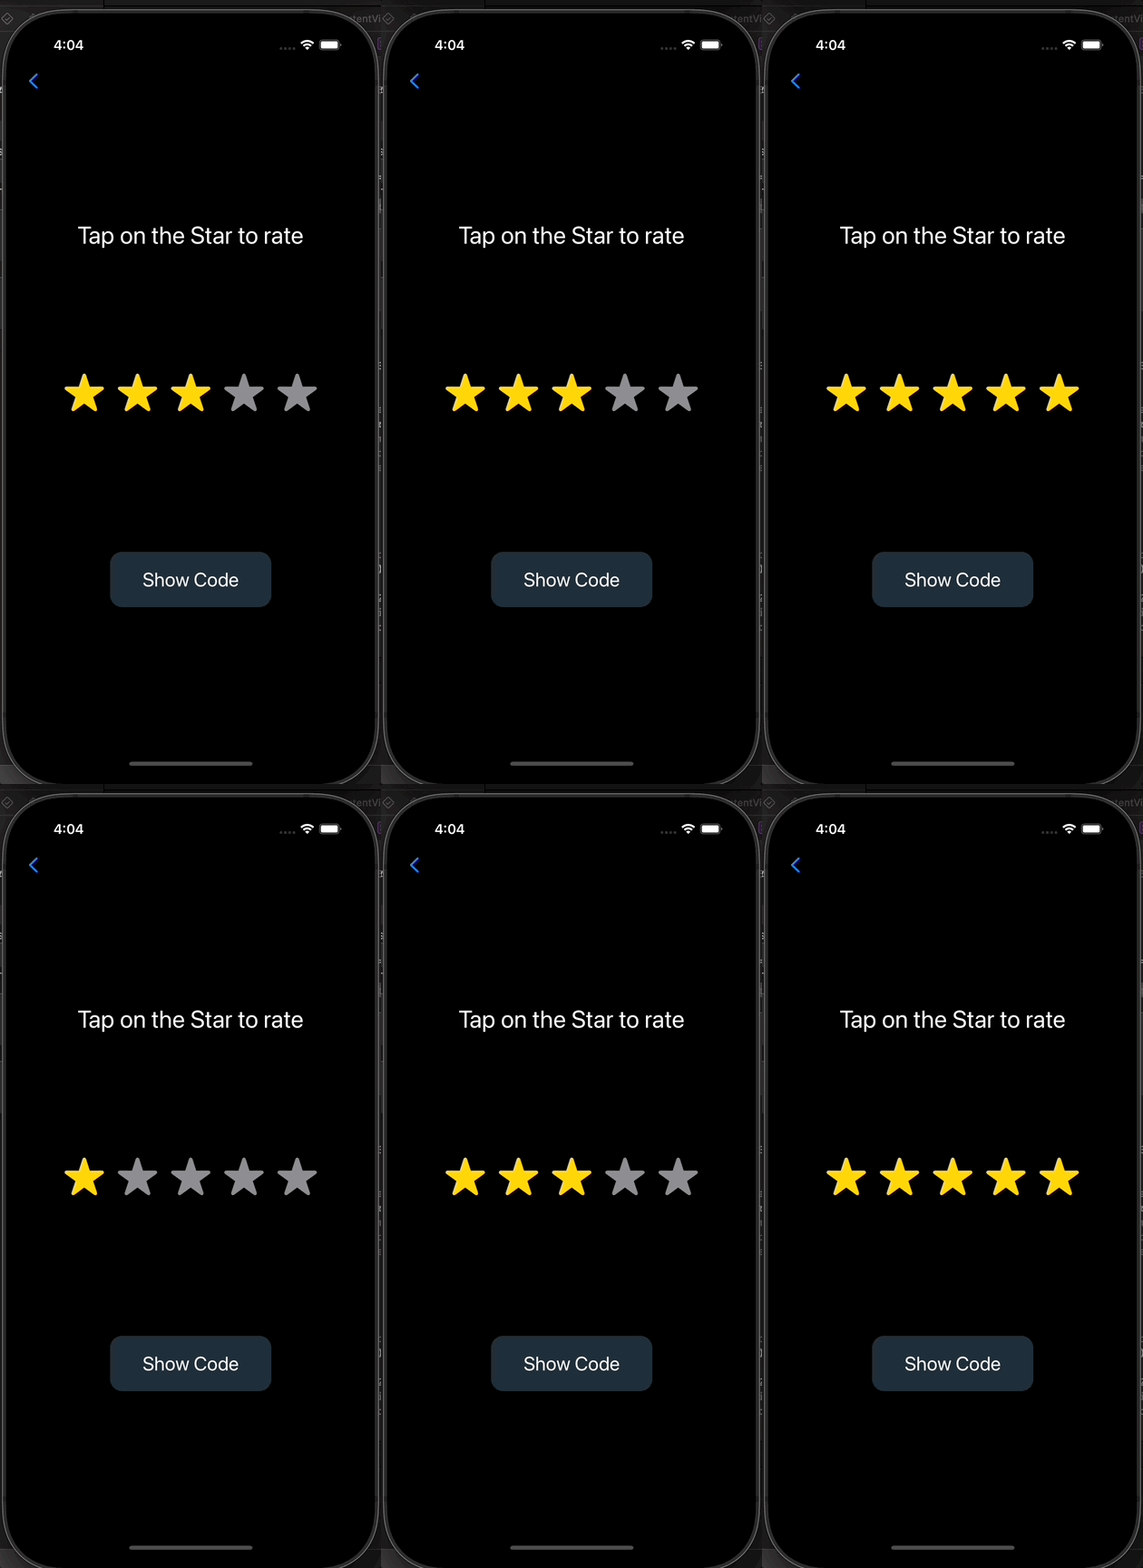
In this post, we will be creating a Custom Star Rating View, where we can give a rating from 1 to 5 stars. In this example we will using a “Star” but alternatively you can use heart or any other image too.

To illustrate, we’ll create a star rating display that allows users to touch photos to submit values between 1 and 5. Although we could make this view simple enough to work for our specific use case, it is always preferable to offer flexibility when necessary so that it may be re-utilised in other applications as well. In this case, we will create six adjustable properties:-

• An option label for our rating view.
• The maximum number of stars. We’ll set it to 5, but in some other cases, you might need 10.
• An On Image, which will be shown when the rating/star is clicked/tapped.
• An Off Image, which will be shown when the rating/star is not clicked/tapped. This is an optional image, because eventually we will be using on/off colors.
• On color, we will be using yellow color, if the star is clicked.
• Off color, we will be using gray color, if the star is not clicked.

We will be using @Binding property to store user’s rating.

So, create a RatingView and start coding :-

@Binding var rating: Int

var label = "Tap on the Star to rate"

var maxRating = 5

var offImage: Image?
var onImage = Image(systemName: "star.fill")

var offColor = Color.gray
var onColor = Color.yellow

How to show stars in Rating View in Swift UI?

The logic for selecting which image to display is basic, but it is ideal to make its own function to make our code more readable and re-usable. The logic is as under:-

  1. If the passed-in number is larger than the existing rating, return the off image. However, if we don’t have any off image we will nil coealsce it to the on image.
  2. If the passed-in number is equal to or less than the existing rating, the on image is returned.

We will add the method at the end of our view :

func image(for number: Int) -> Image {
    if number > rating {
        return offImage ?? onImage
    } else {
        return onImage
    }
}

Now we will add it to our body view as under:-

VStack {
        Spacer()
        Text(label)
            .font(.system(size: 30))
        Spacer()
        HStack{
            ForEach(1..<maxRating + 1, id:\.self){number in
                image(for: number)
                    .font(.system(size: 45))
                    .foregroundColor(number>rating ? offColor : onColor)
                    .onTapGesture {
                        rating = number
                        }
                    }
            }
        Spacer()

        }
star-rating-system-in-swiftui.gif


Related Posts

Multi-line text input in SwiftUI
By Udit Vashisht

How to add multi-line text input option in SwiftUI?

We use SwiftUI’s TextField when the user wishes to input short text strings. However, you should switch to a TextEditor view for longer pieces of text.
Just like TextField, it requires a two-way binding to a text string, but it ...

Read More
Search
Tags
tech tutorials automate python beautifulsoup web scrapping webscrapping bs4 Strip Python3 programming Pythonanywhere free Online Hosting hindi til github today i learned Windows Installations Installation Learn Python in Hindi Python Tutorials Beginners macos installation guide linux SaralGyaan Saral Gyaan json in python JSON to CSV Convert json to csv python in hindi convert json csv in python remove background python mini projects background removal remove.bg tweepy Django Django tutorials Django for beginners Django Free tutorials Proxy Models User Models AbstractUser UserModel convert json to csv python json to csv python Variables Python cheats Quick tips == and is f string in python f-strings pep-498 formatting in python python f string smtplib python send email with attachment python send email automated emails python python send email gmail automated email sending passwords secrets environment variables if name == main Matplotlib tutorial Matplotlib lists pandas Scatter Plot Time Series Data Live plots Matplotlib Subplots Matplotlib Candlesticks plots Tutorial Logging unittest testing python test Object Oriented Programming Python OOP Database Database Migration Python 3.8 Walrus Operator Data Analysis Pandas Dataframe Pandas Series Dataframe index pandas index python pandas tutorial python pandas python pandas dataframe python f-strings padding how to flatten a nested json nested json to csv json to csv python pandas Pandas Tutorial insert rows pandas pandas append list line charts line plots in python Django proxy user model django custom user model django user model matplotlib marker size pytplot legends scatter plot python pandas python virtual environment virtualenv venv python python venv virtual environment in python python decorators bioinformatics fastafiles Fasta python list append append raspberry pi editor cron crontab Cowin Cowin api python dictionary Python basics dictionary python list list ios development listview navigationview swiftui ios mvvm swift environmentobject property wrapper @State @Environm popup @State ios15 alert automation instagram instaloader texteditor youtubeshorts textfield multi-line star rating reusable swift selenium selenium driver requests-html youtube youtube shorts python automation python tutorial algo trading nifty 50 nifty50 stock list nifty50 telegram telegram bot dictionary in Python how to learn python learn python